


As the internet continues to expand exponentially, so does the wealth of information it holds. For businesses, researchers, and data enthusiasts, harnessing this information is crucial for gaining a competitive edge.
Web scraping has emerged as a powerful solution. With its ability to extract data from websites, web scraping has become an indispensable skill for data-driven decision-making.
Among the myriad of web-scraping tools available, Playwright, an automation library, shines as an exceptional choice. Its versatility and ease of use have made it a favorite among developers looking to harness the potential of web scraping efficiently.
In this post, I'll walk you through the process of getting started with web scraping using Playwright. We'll cover setting up the environment, learn the basics of Playwright, and demonstrate how to perform common web-scraping tasks with practical examples.
What Is Playwright?
Playwright is an open-source Node.js library designed to automate and interact with web browsers. It was created by Microsoft's web platform team and is particularly well-suited for headless browser automation and web-scraping tasks. It provides a high-level API that makes it easier for developers to navigate, interact, and extract data from web pages.
Key Features of Playwright
Cross-browser support—Playwright supports all modern browsers, including Google Chrome, Firefox, Microsoft Edge, and Safari with WebKit.
Headless and headed modes—Playwright can operate in headless mode (without a visible browser window) or headed mode (with a visible browser window). This flexibility enables debugging and monitoring when necessary.
Powerful element selection—Playwright's advanced selectors make it easy to locate and interact with elements on a webpage using various strategies like accessibility attributes, CSS selectors, and text matching.
Auto-wait APIs—Playwright offers intelligent waiting mechanisms that ensure the webpage has loaded completely before proceeding with interactions.
Device emulation—With Playwright, you can emulate various devices, such as smartphones or tablets, to scrape mobile-specific data or test website responsiveness.
Scalability—Playwright can handle multiple browser instances concurrently, making it a scalable solution for large-scale scraping tasks.
Cross-language—Playwright is available in multiple languages such as JavaScript, Typescript, Python, and .NET, making it accessible to a wide range of developers.
Cross-platform—With Playwright, you can test and automate web applications on Windows, macOS, and Linux operating systems locally or on CI.
Prerequisites
To get started with Playwright, you need to have the following installed on your local machine:
Node.js—Playwright is a Node.js library, so you'll need Node.js and npm (Node Package Manager) installed. You can download the latest version of Node.js from the official website and follow the installation instructions for your operating system.
Code editor—You'll need a text editor to write your JavaScript code. Popular options include Visual Studio Code, Sublime Text, or Atom. I recommend using Visual Studio Code.
Setting Up the Environment
Once you have the prerequisites installed, open your terminal and run the following command to create a new directory for your project. Navigate to this directory using the cd command:
mkdir playwright-web-scraping
cd playwright-web-scraping
Next, initialize a new Node.js project by running
npm init -y
This will create a new package.json file in your project directory.
Installing Playwright
Now you can install the Playwright package by running the following command:
npm install playwright
With Playwright and the required dependencies installed, we're ready to start scraping the web!
Basic Web Scraping with Playwright
To start off, let's briefly see how to use Playwright for browser automation. This will help you understand the basics of interacting with web pages programmatically.
Create a new JavaScript file, index.js, in your project directory. Add the following code to the file:
const { chromium } = require('playwright');
(async () => {
const browser = await chromium.launch({ headless: false });
const page = await browser.newPage();
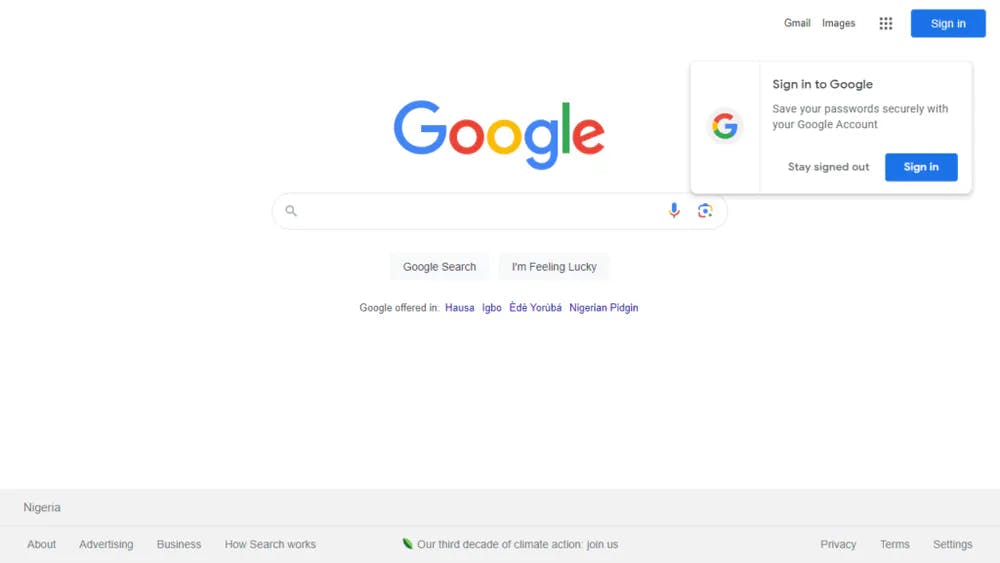
await page.goto('https://google.com');
await page.waitForTimeout(5000);
await page.screenshot({ path: 'google-home.png' });
await browser.close();
})();
In this example, we import the chromium object from Playwright, which allows us to control the Chromium browser. We then use an asynchronous IIFE (immediately invoked function expression) to define our scraping script.
To run the script, execute the following command in your terminal:
node index.js
If everything goes well, you'll see that the script performs the following actions:
It'll open a new Chromium browser window. Since we set the headless option to false, a new browser window will pop up when the script is executed. Setting it to the default value of true will run the script in headless mode, i.e., without a visible browser window.
The browser will navigate to the Google homepage.
It'll wait for five seconds using the waitForTimeout() method. This gives the website some time to load and display content before taking a screenshot.
After waiting, it'll take a screenshot of the current page and save it as google-home.png in the project directory.
Finally, it closes the browser.
You should see a new browser window briefly appear. Navigate to https://google.com, take a screenshot, and then close the window. The screenshot google-home.png will be saved in your project directory
This simple example demonstrates the basic workflow of using Playwright to automate browser actions.
Now, let's move on to web-scraping tasks!
Scraping Text From a Webpage
Let's start with a simple example of extracting text from a webpage. For this example, we'll extract the main heading on Proxyrack's homepage.
Add the following code to your index.js file:
const { chromium } = require('playwright');
(async () => {
const browser = await chromium.launch();
const page = await browser.newPage();
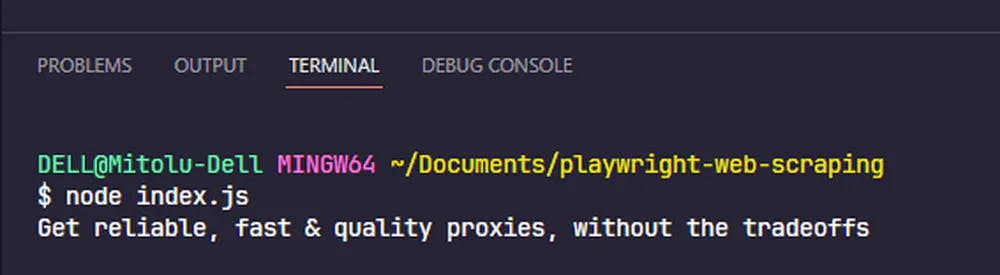
await page.goto('https://www.proxyrack.com');
const headingText = await page.$eval('h1', (el) => el.textContent);
console.log(headingText);
await browser.close();
})();
Playwright provides a number of locators to find elements on a webpage. In this example, we used the page.$eval() method to locate and extract the text content of the first h1 element on the page. The method takes two arguments: a selector identifier and a function. The function receives the element as an argument and returns the result of the function—in this case, the text content of the element.
Upon running the script, you should see the following output in your terminal:
Playwright also lets us use CSS selectors to locate elements. Let's see how to do so using the element's class.
Navigate to the page in your browser and right-click on the heading. Select "Inspect" from the context menu to open the browser's developer tools.
Alternatively, you can use the keyboard shortcut Ctrl + Shift + I (Windows/Linux) or Cmd + Opt + I (Mac).

You'll notice that the heading has three classes: c-PJLV, c-PJLV-dWIXpI-variant-huge, and c-PJLV-hyvuql-weight-bold.
Let's go with the second one, as it's more specific. It's important to choose a selector that is unique to the element you want to scrape. If you use the first class, you'd be selecting other elements on the page, as it's a shared class.
const { chromium } = require('playwright');
(async () => {
  const browser = await chromium.launch();
  const page = await browser.newPage();
  await page.goto('https://www.proxyrack.com');
  const headingText = await page.$eval('h1', (el) => el.textContent);
  console.log(headingText);
  await browser.close();
})();
Scraping Text from Multiple Elements
When scraping websites, it's common that you'd want to get multiple elements. For example, you might want to extract the titles of all the articles on a blog or the names of all the products on an e-commerce website.
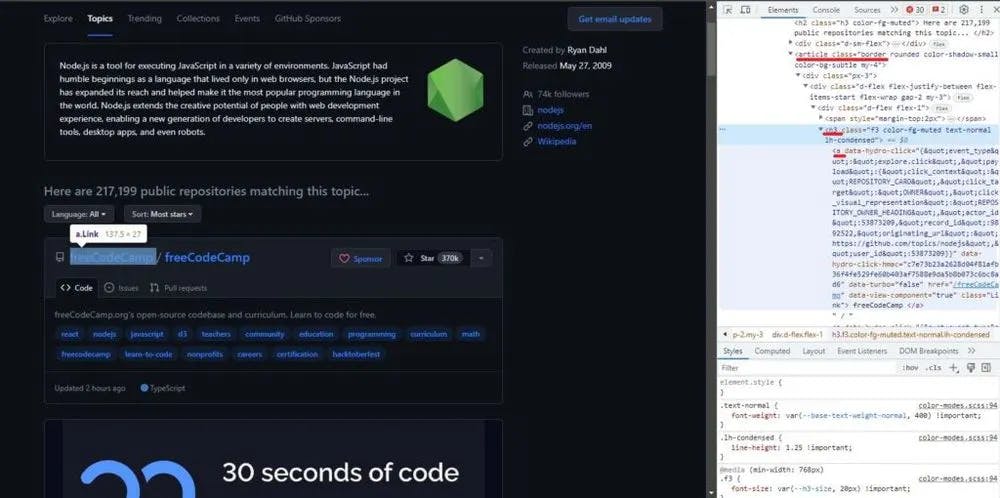
In this example, we'll scrape the details of the repositories on the NodeJS topic on GitHub.
Navigate to the NodeJS topic page and open the browser's developer tools. Inspect the first repository on the page.

Here, you'll notice that each repository is contained in an article element with the five classes. We'll use one of them, the border, to locate all the repositories on the page.
To find the selector for the repository owner and the other data we want to extract, we need to move down the DOM tree. The repo owner is located within the h3 a. Follow the same process to find the selectors for the other data.
Using the selectors, let's extract the data from the page and store it in an array.
Create a new file called github.js and initialize it with the following code:
const { chromium } = require('playwright');
(async () => {
  const browser = await chromium.launch();
  const page = await browser.newPage();
  await page.goto('https://www.proxyrack.com');
  const headingText = await page.$eval(
    '.c-PJLV-dWIXpI-variant-huge',
    (el) => el.innerText
  );
  console.log(headingText);
  await browser.close();
})();
To extract the data from the page, we'll use the page.$$eval() method, which enables us to collect data from multiple elements that share a selector.
Copy the following code into the github.js file to extract the data from the page:
const repositoryList = await page.$$eval('article.border', (repoCards) => {
  const data = [];
  repoCards.map((card) => {
    const [user, repo] = card.querySelectorAll('h3 a');
    const stars = card
      .querySelector('#repo-stars-counter-star')
      .getAttribute('title');
    const description = card.querySelector('.px-3 > p');
    const topics = card.querySelectorAll('a.topic-tag');
    const toText = (element) => element && element.innerText.trim();
    const parseNumber = (text) => Number(text.replace(/,/g, ''));
    data.push({
      user: toText(user),
      repo: toText(repo),
      url: repo.href,
      stars: parseNumber(stars),
      description: toText(description),
    });
  });
  return data;
});
The code block above selects all the repositories on the page using the article.border selector.
Next, it iterates over the repositories and selects the user and repo name, the number of stars, the description, and the topics. It then pushes the data into an array and returns it.
We also defined two helper functions to format the elements. The toText() function returns the text content of an element and removes any whitespace. The parseNumber() function removes the commas from the number of stars and converts it to a number.
Finally, we log the array to the console.
console.log(repositoryList)
The full code should look like this:
const { chromium } = require('playwright');
(async () => {
  const browser = await chromium.launch();
  const page = await browser.newPage();
  await page.goto('https://github.com/topics/nodejs');
  const repositoryList = await page.$$eval('article.border', (repoCards) => {
    const data = [];
    repoCards.map((card) => {
      const [user, repo] = card.querySelectorAll('h3 a');
      const stars = card
        .querySelector('#repo-stars-counter-star')
        .getAttribute('title');
      const description = card.querySelector('.px-3 > p');
      const topics = card.querySelectorAll('a.topic-tag');
      const toText = (element) => element && element.innerText.trim();
      const parseNumber = (text) => Number(text.replace(/,/g, ''));
      data.push({
        user: toText(user),
        repo: toText(repo),
        url: repo.href,
        stars: parseNumber(stars),
        description: toText(description),
        topics: Array.from(topics).map((t) => toText(t)),
      });
    });
    return data;
  });
  console.log(repositoryList);
  await browser.close();
})();
Run the script by using the following command:
node github.js
Then, you should see this output in your terminal:

Interacting With Web Elements
Clicking Buttons and Links
Web scraping often involves interacting with elements like buttons and links to access more data or navigate to other pages. Playwright allows you to simulate clicks on such elements:
await page.click("button#submit-button");
Filling Forms
Sometimes when scraping, you might need to fill in a form, especially when accessing restricted content or interacting with search functionalities. Playwright offers simple yet effective methods to populate form fields and submit data.
To fill in a text input field, you can use the page.fill() method:
await page.fill('input#username', 'your_username');
await page.fill('input#password', 'your_password');
// Submit the form
await page.click('button#submit-button');
Hovering and Right-Clicking
Playwright enables you to simulate mouse actions, such as hovering over an element or right-clicking on it. These interactions can be useful when scraping websites with interactive elements:
const targetElement = await page.$('#target-element');
await targetElement.hover();
await targetElement.click({ button: 'right' });
Taking Screenshots
Playwright provides the page.screenshot() method to take screenshots of webpages, as we saw in an earlier example. You can use this method to take screenshots of the entire page or a specific element.
// Fullpage screenshot
await page.screenshot({ path: 'screenshot.png' });
// Screenshot a single element
await page.locator('h1').screenshot({ path: 'header.png' });
Conclusion
Web scraping with Playwright provides a powerful and flexible way to extract data from websites. In this post, we've covered the basics of getting started with Playwright and demonstrated how to perform common web-scraping tasks using practical examples.
Remember that when scraping websites, it's important to be respectful of the website's terms of service and robots.txt file. Some websites may have restrictions on web-scraping activities, so make sure to review and adhere to their policies.
Implementing rate limiting and using rotating proxies can help you maintain a low profile while scraping and avoiding potential IP blocks.
For enhanced anonymity and IP rotation, consider trying ProxyRack, a reliable proxy service that offers a vast pool of residential proxies to mask your real IP address effectively. ProxyRack provides an additional layer of protection and ensures that your web-scraping activities remain discreet and undetectable.
Happy scraping!
This post was originally published on Proxyrack's blog